
Six Yoga Poses to do Daily for Strength
When we imagine Yoga, we probably think the Instagram world of poses, where we wonder whether its an Adobe-pose (or an #IRL pose). What is often not shown, but far more powerful, are the concrete foundational poses of yoga that strengthen you from core to surface. Yoga has long been known to improve flexibility and balance. However, Yoga is also a power workout, which will help you to minimize injury in any other physical routine you undertake. If you talk to friends or colleagues who don’t practice yoga for strength, you’ll often hear “oh but isn’t it just…stretching?”. In a few weeks you can show off your shoulders, booty, legs, and maybe even abs and let them know that stretching is definitely working for you! An often underrated benefit of yoga (and the best shoulder accessory): STRENGTH.
In other types of physical workouts, strength may come but flexibility certainly doesn’t. I recently did a month of high-intensity interval training (HIIT) but I was less flexible at the end of the month than I was at the beginning. In yoga for strength we get to power up our muscle strength while simultaneously elongating the body. Not to mention working multiple muscle groups at once. This means we can move quicker, lift more, and break less. It also means we will get less tired when doing everyday stuff, like walking the dog, taking the stairs, or cleaning up the house (ugh!). This is because static yoga poses and longer breath counts build muscle endurance, letting us do the things we need to with more ease. And do we need to say it (again)? These holds teach us endurance of the mind, that we can remain calm even in the toughest moments. Strong minds often lead to strong bodies because you are completely capable of overcoming even the most difficult of obstacles. If you commit and offer your mind to the practice, Yoga for strength will help you to preserve and unveil your true power.
This blog takes you through six power moves that will be a new variation for both your muscles and your mind. These six power poses can be done in any order you are comfortable with. However, it has been designed as a short-sequence to be repeated 3-times. Following each pose description, find the transition recommendation to smoothly flow into your next power pose. As with most posture suggestions, be sure to warm up before hand with sun-salutations, or a quick 15-minute yoga session. Get ready to command your mind and find your inner strength!
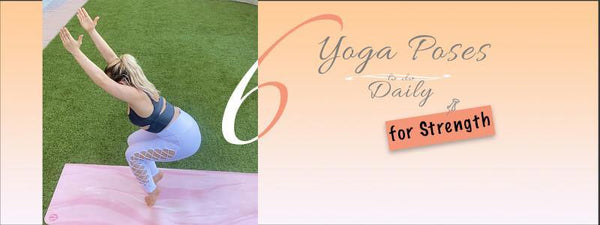
1 – Forearm Plank to Straight Arm Plank
Think about your core as a bridge to the rest of your body. If you want to move your leg, your brain sends the message across the bridge, telling your core to transfer power all the way down to your foot. We’re often appreciative of our well orchestrated ability to move our arms and legs but forget that our core is the conductor. Strengthening the orchestra means training the conductor, and plank does just that. Activating and tightening our abdominals also brings a new found safety to our backs. A strong core creates a strong back, improving our flexibility and limiting our risk of injury. And if you read our last two posts, you may have guessed it, that plank also improves balance. Plank helps to align the pelvis and spine, giving you everlasting benefits in your daily routine.
When done correctly, plank is extremely challenging across a variety of muscle groups. I hope your ready because this is our fire move.
Power perk: This is a full-body move, strengthening you from head to toe:
- Neck
- Shoulders
- Abs
- Back
- Booty
- Quads

How to do this pose:
- Start out in a table-top position (hands below the shoulders, knees below the hips).
- Come onto your forearms so that elbows are now under shoulders.
- Clasp the hands together or keep palms of the hands flat on the mat.
- Send your right leg back followed by your left, so that your entire body is now lifted off of the mat.
- Draw your bellybutton to your spine, and activate your quad muscles so much so that they pull away from your kneecaps.
- Hole for 5-breaths (yes, 5 full breaths).
- Lift your left forearm off the mat, straightening the arm with palm flat on the mat. Followed by the right, so that now both arms are straight and supporting you.
Hold count: Hold each plank variation for 5-breaths.
Transition recommendation: From straight arm plank begin to walk your hands back towards the feet. You will feel yourself easing into a downward-dog shape. Keep going until your hands reach your feet and your feet are flat on the mat. Hug your elbows to give yourself a nice forward-bend (ragdoll) stretch. Place your hands back down on the mat, and you are in starting position for standing split.
Beginner modification: Doing this pose with both knees on the mat, or one knee is perfectly acceptable. No matter which beginner variation you chose, be sure to really tighten your core so you train your muscles for the full extent of the posture.
Advanced modification: In both forearm plank or straight arm plank, lifting any one limb will amplify the strength required from your core. Start with one limb and make sure you maintain your balance. I like to lift alternate arm and leg (left arm, right leg).
2 – Standing split (Urdhva Prasarita Eka Padasana)
Oh the love-hate relationship with Standing Split! This baby-inversion is deceivingly challenging. It brings with it however, all of our favorite benefits of inversions: increased blood flow to the mind/ nervous system, reduced fatigue, alleviation of headaches and perhaps some clarity. From a strength perspective, this requires a complex mix of muscle work. You are supporting the weight of your entire body on one standing leg, requiring maximum strength and activation of your balancing muscles. I love this asana for flow sequences, because it requires us to be heavy and light at the same time, giving us great fluidity in our motion. This pose will help us find peace in the chaos. Use your breath as a silencing tool for this position because your muscles will likely be loud!
Power perk: The benefit of this pose comes when you focus on activating the muscle groups, not how high you can get the lifted leg:
- Biceps/ triceps
- Quads
- Hamstrings
- Calves
- Ankles

How to do this pose:
- From forward bend, be sure that both of your palms and fingertips are grounded into the mat.
- Lift your right heel off of the mat and gently bend slightly forward so that your torso rests on the left thigh.
- Walk your hands ever so slightly forward and transfer all of the weight to the left foot.
- Slowly begin to lift the right leg back behind you, raising it as high as you feel comfortable with.
- Engage your core and your inner thigh muscles to keep your pelvis (or right and left hips) evenly facing the mat.
Hold count: 5-breaths (each leg).
Transition recommendation: Release the elevated leg back to the mat, coming into a standing forward fold. Clasp opposite elbows and let the neck and head hang heavy (rag doll). Gently release the hands back down flat on the mat, and you are in position to smoothly move into varied chair pose.
Beginner modification: If you have very tight hamstrings, try positioning yourself close to a wall. The foot of the raised leg can press flat against the wall, helping to support your leg.
Advanced modification: Wrap both hands around the standing calf/ ankle, or just wrap opposite arm around the outside of the standing ankle.
3 – Varied Chair Pose (Variation of Utkatasana)
I can’t think of the last time I gave a class without chair pose. Not only does it take our practice to the next level, but it asks us to find mindfulness in the heat of the moment. This variation of chair pose takes all of the traditional benefits of the pose and amplifies them. It asks even more from our body and more from our mind in this yoga for strength pose. Another timeless teaching of Yoga for strength and flexibility is limits! Yes- we all have them. When you feel yours, trust your instinct. The key to improving your strength (or balance, or flexibility) is to listen to what your body is saying, and allow growth at the pace that is right for you. This variation will test your physical limits, and ask you for mental endurance to achieve a new found level of your practice.
Power perk: Your lower body is strengthened while your upper body is elongated, bringing together the best combo of power and flexibility:
- Shoulders
- Core
- Quads
- Booty
- Calves

How to do this pose:
- From forward fold, inhale bending the knees slightly and coming up to stand.
- From standing, bend the knees slowly but as deeply as you can without allowing knees to pass the toes.
- Engage the core (pressing belly-button to spine) and sweep the arms up by the ears.
- If this feels like a maximum challenge, stay right here. If you feel you have the strength and stability to take it to the next level, continue to step 5.
- Raise your left heel off of the mat, so that the balls of the left feet are firmly pressing down. Give yourself a few seconds to gauge your stability.
- Begin to raise your right heel off of the ground so that both heels are lifted.
- Really activate your core to support your body in this intense posture.
- Pick a focal point to help you maintain your balance.
Hold count: 8-breaths (ahhh!)
Transition recommendation: Release both heels back to the mat. Gently bend the knees and come into a forward fold. Release the hands to the mat and slowly lift yourself to stand. Spread the feet so they are just about hips-width distance apart. You can now smoothly move into power-malasana.
Beginner modification: Keep your back against the wall if chair pose feels wobbly for you. Stay in traditional chair pose and you will still get all of the benefits of this asana. You can also try lifting just one heel off of the ground, giving your body a taste of the full extent of the variation. Play with lifting the left heel, then the right, and challenge yourself to keep the upper body completely still as you shift between feet.
Advanced modification: As if this could get any more difficult! You can have a little fun here and bring the hands to heart center. Twist at the belly button and hook the outer right elbow outside of the outer left thigh. Repeat on the outer side for a variation with a twist!
4 – Garland Pose (Malasana to stand)
Whenever I hear the word squat I want to run and hide. Let’s trick ourselves into this one by calling it Malasana instead. And it wouldn’t feel quite right if I didn’t throw a little HIIT action in with the Malasana. This pose has a long list of benefits and can be particularly helpful for those that have a sedentary lifestyle or workplace. This is a grounding pose, that will bring clarity and calmness to your strength-flow. You also utilize the entire extent of the leg and arm muscles, both elongating and strengthening major body areas.
Power perk: We spend so much time seated at a desk, or laying in a bed, that our posture and strength unknowingly fades. Bring back your resistance and form by practicing Malasana (the seated position of our ancestors!):
- Shoulders
- Abs
- Booty
- Quads
- Ankles
- Joints

How to do this pose:
- From standing, inhale the arms straight up by your ears, palms facing each other.
- Gently exhale coming down into a squat position, keeping your thighs relatively close together.
- Once in the squat (low-booty!) exhale your torso slightly forward in-between your thighs, and bring your hands to heart’s center (prayer).
- Use your elbows or triceps to gently push your legs outward.
- Your toes will naturally angle outward.
- From here, exhale firmly pressing into the heels lifting your body to stand.
- Send the arms straight up by the ears.
- Exhale to come back down repeating full Malasana (steps 1- 7).
Hold count: Repeat Malasana-stand sequence 6 times.
Transition recommendation: For the easier of transitions, place your hands in front of you flat on the mat. Firmly press into the mat and bring yourself to a table top position (knees under hips). Cross your ankles and walk your hands back towards your knees, gently pushing your booty to the mat. Now in your seated position, you are ready to smoothly move into Staff Pose.
For the more advanced transition, add chaturanga. Place your hands slightly in front of you and press firmly into the mat. Gently lean slightly forward and with a firm grip, use your core to float (step) your feet and legs back. From this plank position, lower down to form a 90-degree angle with your arms. Triceps should be in line and touching the ribs to move smoothly through this chaturanga. Inhale, gently shifting forward onto the tops of the feet, arms extended straight for upward facing dog. Press back onto the balls of the feet, heels in the air, hips up for downward dog. Rest here for a few breaths. From downward dog, gently bring your knees down to the mat coming into a table top position. Cross your ankles and gently walk your hands back to your knees pushing your booty to the mat. From this seated position, you are ready for Staff Pose.
Beginner modification: To maintain your balance, practice this malasana series near the wall or a stable piece of furniture. Reach out with your arms to support yourself and keep yourself stable. Hold as much as you need, and gently lessen your reliance over time.
Advanced modification: There are many advanced modifications for Malasana, but today, we are focusing on strength. To get the full extent of muscular work, increase the transition speed from Malasana-to-stand and double the number of repetitions.
5 – Staff Pose (Dandasana)
From the outside, Staff Pose looks like an easy 90-degree seated position. What you know very well if you’ve ever practiced this pose, is that it’s anything but easy. Dandasana is the foundation of seated postures, and requires an immense amount of muscle work and activation. In the full extent of the pose, and by using our muscle groups correctly, we are putting most of the responsibility on our core. This is a favorite in the list of Yoga for core strength. In Dandasana, our core is bridging the energy to the required muscle groups and supporting most of our body. Much like Malasana, Staff Pose also works to correct our posture. This pose challenges our breath work because we have to tighten the core so much. It involves a level of mindfulness to keep the body oxygenated with the complex muscle engagement. This new level of awareness will wake up the mind and perhaps some muscles you didn’t even know you had.
Power perk: This is a powerful posture corrector tied in with a breath-work class all in one.
- Chest
- Back
- Abs
- Quads
- Hamstrings
- Ankles

How to do this pose:
- From a seated position, unwind the legs and send them straight out flat on the mat in front of you.
- Straighten the torso, and send the crown of the head towards the ceiling
- Hands should be flat on the mat just outside of your hip-area.
- Imagine sitting more forward on the booty (or sitting-bones), without moving your torso forward.
- Activate your quad muscles and draw them off of your knees, while trying to straighten your legs flat against the mat.
- Flex your ankles and reach your big toes towards your nose.
- Press your bellybutton towards your spine and send your shoulder blades down your back.
- Everything (and I mean everything) should be active.
Hold count: 10-breaths.
Transition recommendation: From your seated posture, gently roll one vertebrae at a time down your back so that you are flat on the mat. From here, bring your feet in flat on the mat as close in to your booty as possible. Once you can touch your heels with your finger tips, you are ready to smoothly move into Bridge Pose.
Beginner modification: Because this is a gentler-seated variation, it poses less risks of injury. You can place a blanket under your booty to ease any tension and allow you to stay in the pose for longer. You can also try practicing Dandasana against a wall to support your back.
Advanced modification: Instead of imagining what more the pose can do, focus on what more you can do in the pose. Can you tighten your core just a bit more? How about rolling your shoulder blades a little lower down your back? To really kick up the power, hold this pose for a minute. Challenge yourself to keep your in-breaths and out-breaths constant and even. Use your inner strength to develop your muscular strength.
6 – Bridge Pose (Setu Bandha Sarvangasana)
We mentioned that in most poses, the core acts as a bridge for strength and energy. Coming to our last power-pose of the flow, Bridge Pose, we physically mimic a bridge. Yoga for core strength further emphasizes the dominance of the core in our bodies. It opens our chest, abdominals, and leg muscles. We almost instantly learn which parts of our body is tight, is more flexible, or has hidden pain. Bridge Pose requires work to maintain the pose. When we lift our pelvis, our legs have a tendency to sprawl. This requires the unrelenting effort of our leg muscles to maintain supported form. If you get really good at this pose, it also offers an active rest, bringing you down from your past 5-power moves (hopefully!).
Power perk: Since your heart is elevated above your head, you get all the benefits of an inversion with a milder touch than other inversions:
- Back
- Chest
- Abs
- Inner Thighs
- Ankles

How to do this pose:
- Continue to bring your heels into your booty as much as you possibly can, making sure they are hips-width distance apart.
- Use your upper arms and feet grounded into the mat to lift your hips into the air.
- Activate your inner thighs, keeping your thighs and knees parallel guiding forward.
- Begin to clasp your hands underneath your lower back, pressing towards the floor to activate your arms.
- Use the activation of your arms to support yourself coming onto the edges of your shoulders.
- Use the strength of your legs and booty to continue to press your hips to the sky.
- Gently lift your chin away from your chest to reduce the strain on your neck.
Hold count: 8-breaths (repeat 3 times).
Transition recommendation: This is perhaps the best transition of the day. Lower your hips back down to the mat one vertebrae at a time. Bring your knees into your chest and give yourself a hug, even tighter. Release your knees, and to have a little fun, explode like a star. Literally open the arms and legs, and gently lay them to the mat. Feeling like a star, wiggle your limbs until you are comfortable and prepare to gently rest in Shavasana (corpse pose).
Beginner modification: For someone with tight shoulders (like me!) this can be challenging. Instead of clasping your hands underneath your back, allow them to lay flat along your body with palms pressing flat down.
Advanced modification: Once in full Bridge Pose, begin to lift your heels, continuing to raise your hips to the sky. Lower them back down. Repeat 5 times.
Lastly, once you’ve transitioned into your Shavasana, try and hold for 5-minutes! This is usually more difficult for me to do than any other physical asana.
The Bottom Line
Why do we practice Yoga? I think everyone has a different answer for this, and indeed our relationship with the practice changes over time. I first began, quite honestly, because I wanted to tone my shoulders. Although the shoulders came later, what came first was a mental awakening that I couldn’t have gotten through any other method. It was unexpected and it was lovely. Often overwhelmed without perhaps even realizing it, I now found a new way to train my perspective of the world. It helped me to become the best version of myself inside, and the physical aspect certainly accompanied it. I am now able to live, eyes-wide-open.
While we each have our own reasons, I think it’s important to remember the collective benefits this practice offers. Yes, we focused on strength today, and previously we had focused on flexibility and balance. Yoga is a holistic practice because the benefits are never singular. Having a strong body allows as more tranquility in the mind, and a calmer mind allows us to focus more on our strength training. Like most things in life, Yoga mimics the circular efforts of the things we choose to expend our energy on.
Yoga for strength allows us to freely move through our daily routines more safely. We won’t injure ourselves as easily, and aches seem like they come less often. Our joints are well oiled and our limbs somehow feel a bit lighter. More than that though, we train our bodies to persevere through movement. We are moving more time than not, and we can do so more efficiently. When we are seated at a desk, our core and our quads can be a bit more active. When we are running in the playground with our kids, our back ends up being more protected. It takes an enormous amount of strength just to keep ourselves balanced everyday. This power flow encourages the postures in the body to make every future move we make, count that much better.
Strong bodies are created by strong minds. Challenge yourself to try this power flow several times throughout the week, and I assure you the benefits are limitless. You are as powerful as you believe you are.
If you've enjoyed this post, please let us know, we love to hear from you! As always we strive to offer products that are central to yoga culture. Please shop our apparel, eco-friendly yoga mats, jewelry and even yoga block and wheel props to enhance your practice!
By Brittany Regnar
